Creating mosaic art indoors for an outdoor project

AIMG_1920ll of the student mosaics that we’ll be installing outside in the playground are being created indoors this winter. There are several ways to create a mosaic “off site”, using an indirect method of mosaic art. We will be creating our mosaics in pieces on clear contact paper as a temporary surface, then using a clear mosaic tape over the top of the designs. The special mosaic tape is stronger and stickier than the contact paper so that the contact paper can be removed and the mosaic can be installed onto the concrete surfaces using thinset mortar when the weather is dry and temperate this summer.

This mosaic technique is especially nice for the students because there’s no glue. Also, we are creating the artwork upside-up on the contact paper.

The process:

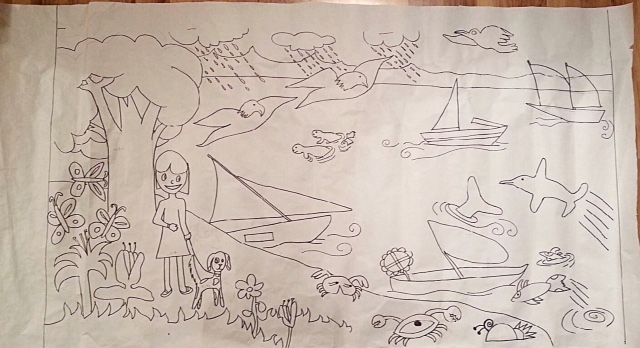
  1. Clear contact paper is taped sticky-side up over the simple drawing
  2. The mosaic is created with care on the tacky contact paper
  3. Mosaic Tape is carefully placed on top of the mosaic
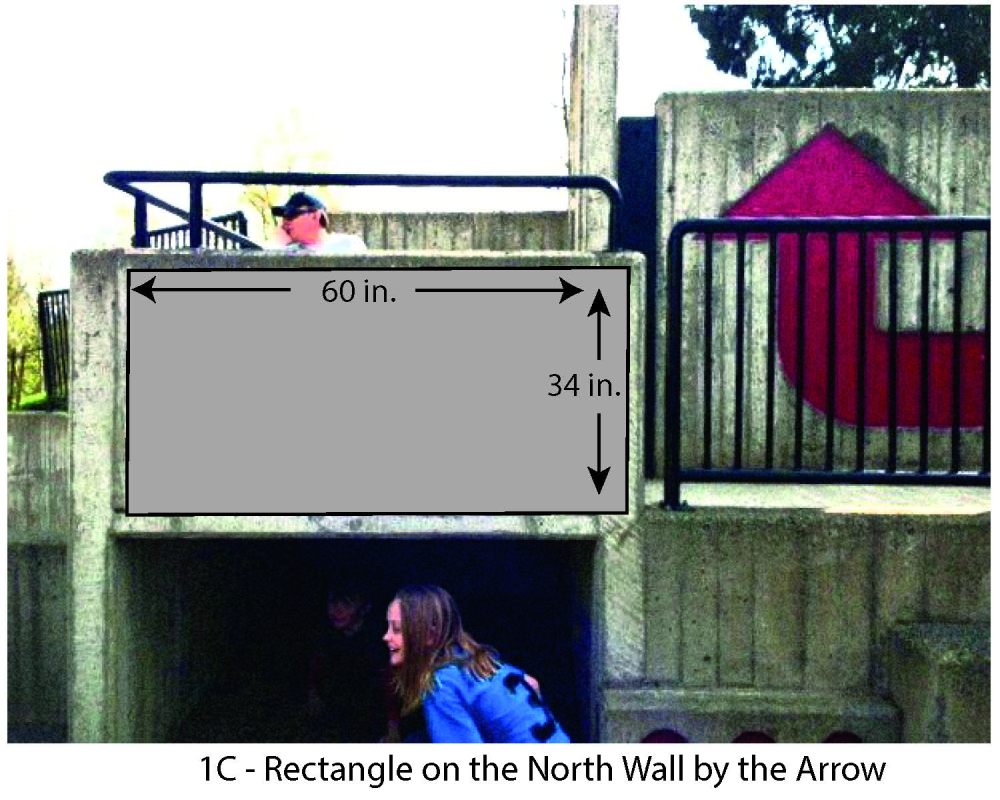
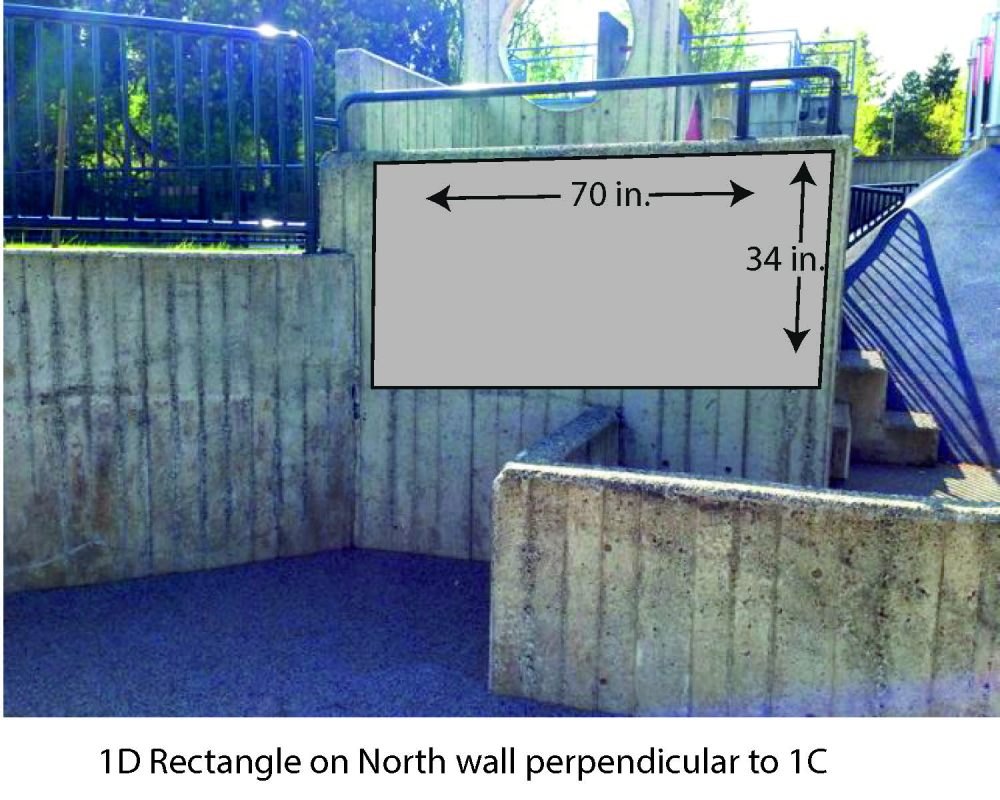
  4. The mosaic is cut out using an exacto knife so that it can be placed into the landscape.

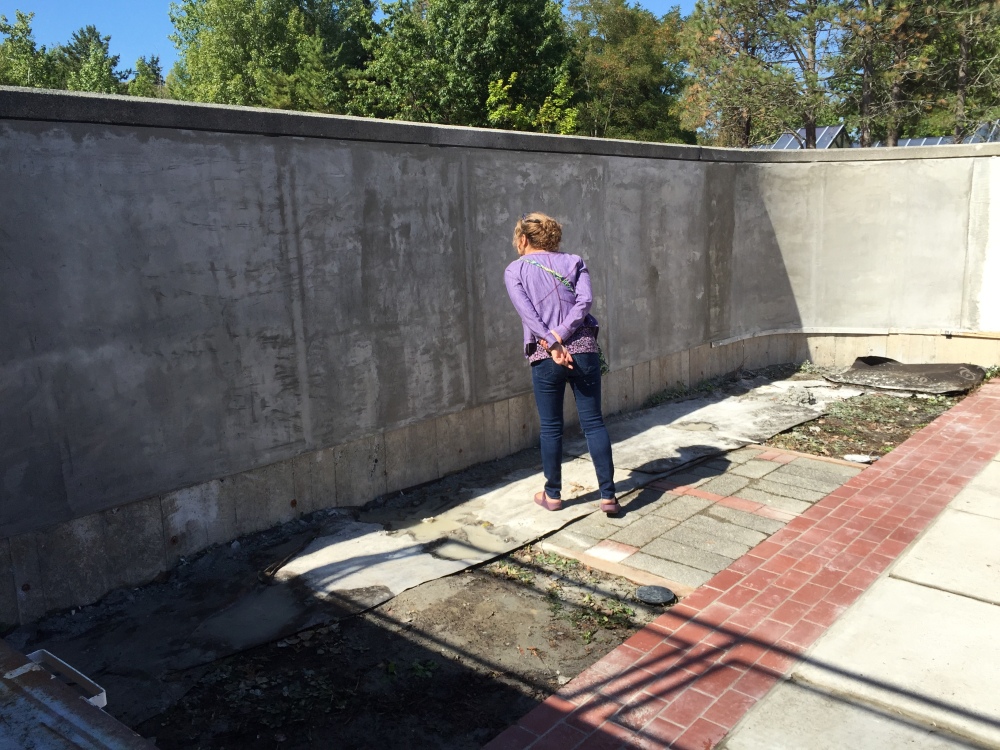
Although installing these mosaics will require painstaking care, having the glass tesserae directly adhered with thinset mortar onto the concrete surfaces should be very strong.

Joe Moorman does an excellent job of explaining this in more detail in his blog: http://blog.mosaicartsupply.com/mounting-a-mosaic-on-clear-adhesive-film/

© Sandy Glass 2015

Workshop #2: Drawing, Painting, Mosaics!

A beautiful mosaic mural begins with wonderful drawings! Because our medium is tumbled glass, we are working with relatively big “pixels” and our drawings need to be simple – like a children’s coloring book.

Our mosaic will certainly be colorful! After a short discussion about color, value and contrast, students had an opportunity to paint the mural sketches and play with color. It was fun to watch the landscape come alive with color as the children worked collaboratively.

Some students also started playing with the mosaic process. I was so impressed by how careful they were to place the small pieces of tumbled glass in place and by their quality work. Below are a few examples.

(Thanks Sari, for the beautiful pics!)

Our workshop room was full of activity this afternoon! I’m so aware that this worked because of our amazing volunteers. Thank you!!!

Preparing for Workshop #2

Since our last workshop, Jose Orantes and I have been very busy…

JoseSketch2

Preliminary Sketch by Jose Orantes

During the week, Jose created a “small” sketch and then full-sized sketches that incorporated the children’s drawings into a Pacific Northwest landscape. It’s fun to see the students’ drawings fit into the scene. A sample of Jose Orantes’ sketch is shared above.
(The drawing will continue to evolve.)

Meanwhile I was busy preparing the tumbled glass. All of it needed to be washed and dried so that the students can work with clean materials. So many colorful little hills of glass randomly drying throughout my house.

We met on Monday morning and I copied some of the images so that our “mosaic team” will be able to try creating some mosaic pieces in our workshop. I was happy that UPS delivered the  tempera paint and brushes for another opportunity to play with color on Tuesday afternoon.

(You’ll see lots of color in the next blog post!)

Photo


First Workshop with 3rd – 5th graders

Today was our first workshop at the Mercer Island Community and event Center. With over 30 students, we began the process of drawing for the two mosaic murals that will be created by the Mercer Island 3rd – 5th graders. Artist Jose Orantes will be using his magic and talent to integrate the student drawings into a landscape.

The photos today  show the areas in the Luther Burbank Park Playground where the student mosaics will be installed in the Summer and also some of the brainstorming of ideas that we did before drawing for the murals.

1C-NorthWallByArrow+measurements

1D Rectangle on North wall perpendicular to 1C

Thank you to all our volunteers and a wonderful group of students!

About the LBP Playground Mosaic Project…

The mosaic project includes 4 public mosaics in the playground at Luther Burbank Park.

If you go to the playground, you’ll notice that the four areas to be enhanced with mosaics have been made smooth.

1A: 5’ high x 38’ wide

1B: 14” high x 25’ wide

1C: 34″ high x 6′ wide

1D: 34″ high x 70″ wide

SandyInspectingLBPwall

Sandy inspecting the concrete walls that have been grinded and smoothed. Excellent work by JoeTile.com