Today’s workshop with IMS students was productive, collaborative and fun. I’m so aware that many stars need to align for a successful workshop, so this evening I feel grateful.
To prepare for this afternoon, each square foot of the mosaic was labeled, traced, taped to foam core, and covered with a piece of contact paper (sticky side up) and protected with the backing. Thanks, Roxanne, for making this somewhat overwhelming task fun.

The bird silhouettes were traced on to our to-scale 25′ mural

Each square foot is retraced, covered with contact paper.

Everything is labeled so that finished mosaics will correlate back to the artwork.
Today’s agenda included:
Working collaboratively to create something cohesive
Working with a limited palette of about 20 colors of tumbled glass, students worked together to plan out a color scheme for our mural. Things we considered included contrast between colors, opportunities to create illusions of transparency and overall color balance. Hopefully we got it right but we’ll probably need to make some adjustments next week.
Mosaic techniques and tips
We also discussed how to place the glass so that there is a constancy of pattern created when the mosaic is grouted, how to cut glass using wheeled nippers and how to stay safe by always wearing goggles while cutting glass and using a brush and dustpan to sweep away glass “crumbs.”
As you can see in the photos, some beautiful mosaic work is in progress.
A BIG thanks to our super star volunteers! 🙂


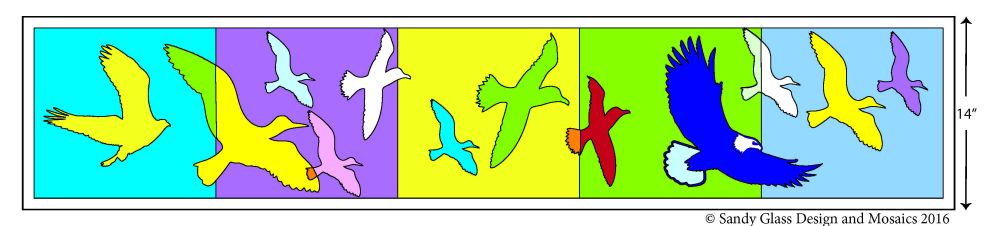 The concept of (1B) a 14″ x 25′ border that will be created with this group is “Birds in Flight” and these students will be involved in the process of designing and creating a nearly 30 square foot Public Mosaic for the playground! Today they traced bird silhouettes and arranged them on pre-measured boards to create the design. Other students used a template to measure the background color changes.